Friday, February 28, 2014

Steam Bent Eating Spoon.


I've gone crazy for spoon carving again recently.  My shop mate and I started a once monthly spoon carving night in our workshop for friends and acquaintances to stop by and learn to carve spoons.  One of the reasons that we wanted to do this was to inspire both of us to make more spoons.  It has worked.  Zach has carved enough spoons to outfit five armies, and I've finished a couple myself, but this is the one that I am most excited about.


It is an eating spoon, about 8 inches long, carved from a steam bent blank.  I will write more about the process in the future, but for now I just want to show some pictures of a finished spoon.


I sand the bowl and sometimes the upper portion of the handle, but the rest of the spoon is straight from the knife.  I have more fun carving spoons than doing just about anything else.


Dan Farnbach at Popular Woodworking interviewed me a couple of weeks ago about the tools that I make and I went on a little tirade about my deep and abiding love of spoon carving.

Here is the link: Chairmaking Tools that Feel and Work Right.

Monday, January 27, 2014

Tuning Up and Re-handling Old Chisels.


In the last five years I have been fortunate to inherit two boxes of tools that belonged to my great grandfather.  He was trained as a boat builder in Cornwall, England, but eventually moved to the states where he became a house carpenter.  Most of his tools are fairly common; socket chisels, a few gouges, layout tools, a backsaw, etc.  There are a couple of real gems from his boatbuilding days though.  Every couple of months I get some inspiration up and tune one of his tools to replace some of my less cherished modern, plastic handled equivalents.  Lately I have been cleaning up a couple of his chisels.

1/2" chisel with a hump across its width.

I start tuning up a chisel by lapping the back on a granite plate with 150 grit sandpaper adhered to it.  I am no fan of lapping and I will do pretty much anything I can to minimize the number of monotonous hours in my life spent making things flat by rubbing them back and forth on a stone.  The picture above shows the results of lapping one of these chisels 20-50 times.  This chisel had a hump that ran down the middle of the back from the edge to the socket, probably from years of sharpening on dished out oil stones.  In my experience this is pretty common with old chisels.  A couple of months ago I found that I could use my bench grinder to reduce my hours of lapping misery.

Hollow ground back of a 1" chisel.

By lightly grinding the center section of the back I create a concave surface that references easily on my stones.  It also reduces the total surface area that I am abrading and quickens the flattening.  The grinding is only a couple of thousandths of an inch deep and will lap out from repeated honing over time.  In my experience, it is easy to flatten concave surfaces, and a little squirrely trying to flatten convex surfaces.  This is true whether I am flattening a wide board with a handplane or the sole of the handplane with abrasive paper mounted on a granite reference plate.  In most situations flattening begins, for me, with creating a slight concavity.

Setting up for grinding.

This is the position that I use for grinding the hollow in the back.  In the photo the grinder is off. The tool rest is moved close to the grinding wheel and angled steeply.  The chisel then rides in the vee shaped gap between the top edge of the tool rest and the grinding wheel.  The chisel is angled somewhat down.  I eyeball to see that the center of the back is touching the wheel, move the chisel in and out, and then check the scratches from the wheel to see that it is touching where I want it to be.

Scratches right along the center.

Then I take the chisel back to the grinder and practice the motion one more time, memorizing in my body the angle that I am holding the back in reference to the wheel and the downward angle that I am sliding the chisel.  All that is left is firing up the wheel and repeating the motions that I have just practiced.  A light touch is key to success.

Results.

Above are the results straight from the grinder.  You can see that I got quite close to the left edge, closer than I would like.  This is the narrowest chisel that I have ground like this.  Wider is much easier.  To the granite plate.


Twenty strokes on the reference plate and the first inch of the blade is flattened at the cutting edge and down the sides.  I think I gave this one a couple more licks before moving up through the grits.

Polished to P600.

That entire process took under twenty minutes.  I have a great way to grind short stubby chisels like the one inch chisel pictured above and below, which I will save for another time.  For now I will just say that I prefer to hollow grind my chisels, with some exceptions for particular tasks or specialty chisels.  I find hollow ground chisels very easy to maintain so they are always sharp when I reach for them.

Long paring handle on another vintage chisel.

Above is another 1 1/4" socket chisel from my great grandfather with a replacement handle that I made.  The handle is 12 inches long.  I think of this tool as a miniature slick.  It hangs on the wall right next to my bench and I use it constantly.  If you have never turned replacement handles for socket chisels, you are missing out big time.  I think it is the most instant gratification woodworking that is possible.  It is also a great use for scraps of exceptional wood that are too small for anything else.  The handle above is ribbon mahogany that was a stair tread that I pulled out of a dumpster.

Where socket joins handle.

I like to leave a 1/8" gap where the taper that fits into the socket continues before stepping up the diameter of the handle to match the outside diameter of the socket.  This gap allows for the handle to slide further into the socket without butting up against the shoulder as the handle size shifts with the relative humidity of the seasons.

Handle blank chucked in the lathe

Roughed down to 1".

I wanted a short handle for the one inch chisel that I tuned up.  I had a macassar ebony offcut that was badly checked.  I was just able to get a piece big enough to get a one inch diameter handle out of it.  The piece was a just over five inches long.  I started by roughing down the blank to one inch diameter.

Test fitting the taper.

Next I created the taper that fits into the socket.  I started by measuring the depth of the socket with a narrow ruler.  I transferred that measurement to my handle blank while it was spinning.  Next, I measured the inside diameter of the socket at the opening and used a parting tool to size the top of the tapered section of my handle.  Then I guessed at the dimension of the narrow portion of the socket and parted the narrow end of the handle to that dimension.  Back at the lathe I connected the dots with a spindle gouge and then tested the fit in the socket.

Look for the shiny spots where the socket is rubbing.

During the test fit I try to wiggle the handle to tell whether the taper is too big at the bottom or top.  I also spin the socket around the handle and when I remove it I look for the spots on the handle that were rubbing.  These are the high spots and I remove incremental amounts of material from the high spots before re-testing the fit.  In the above picture, notice the high spots at the narrow end of the handle and also a ring of contact towards the top.  There was a burr on the top edge of the socket that was preventing the rest of the taper from seating properly.  I ground the burr away and then tested the fit again.

A couple rounds of test fitting later...

After a few more trial and errors I had the fit that I wanted and the chisel slid to its final position on the handle.  I like chisel handles to be a straight one inch diameter that taper over the last two inches to a diameter that is continuous with the outer diameter of the socket.  To create this shape I part the point of the working part of the handle nearest to the socket to a dimension slightly larger than the outer dimension of the socket.  Then I mark a point with a pencil two inches from the shoulder of the handle and fair the shape from the one inch diameter portion of the handle to the parted diameter adjacent to the shoulder.

Sanded.  Chamfered.  Finished.

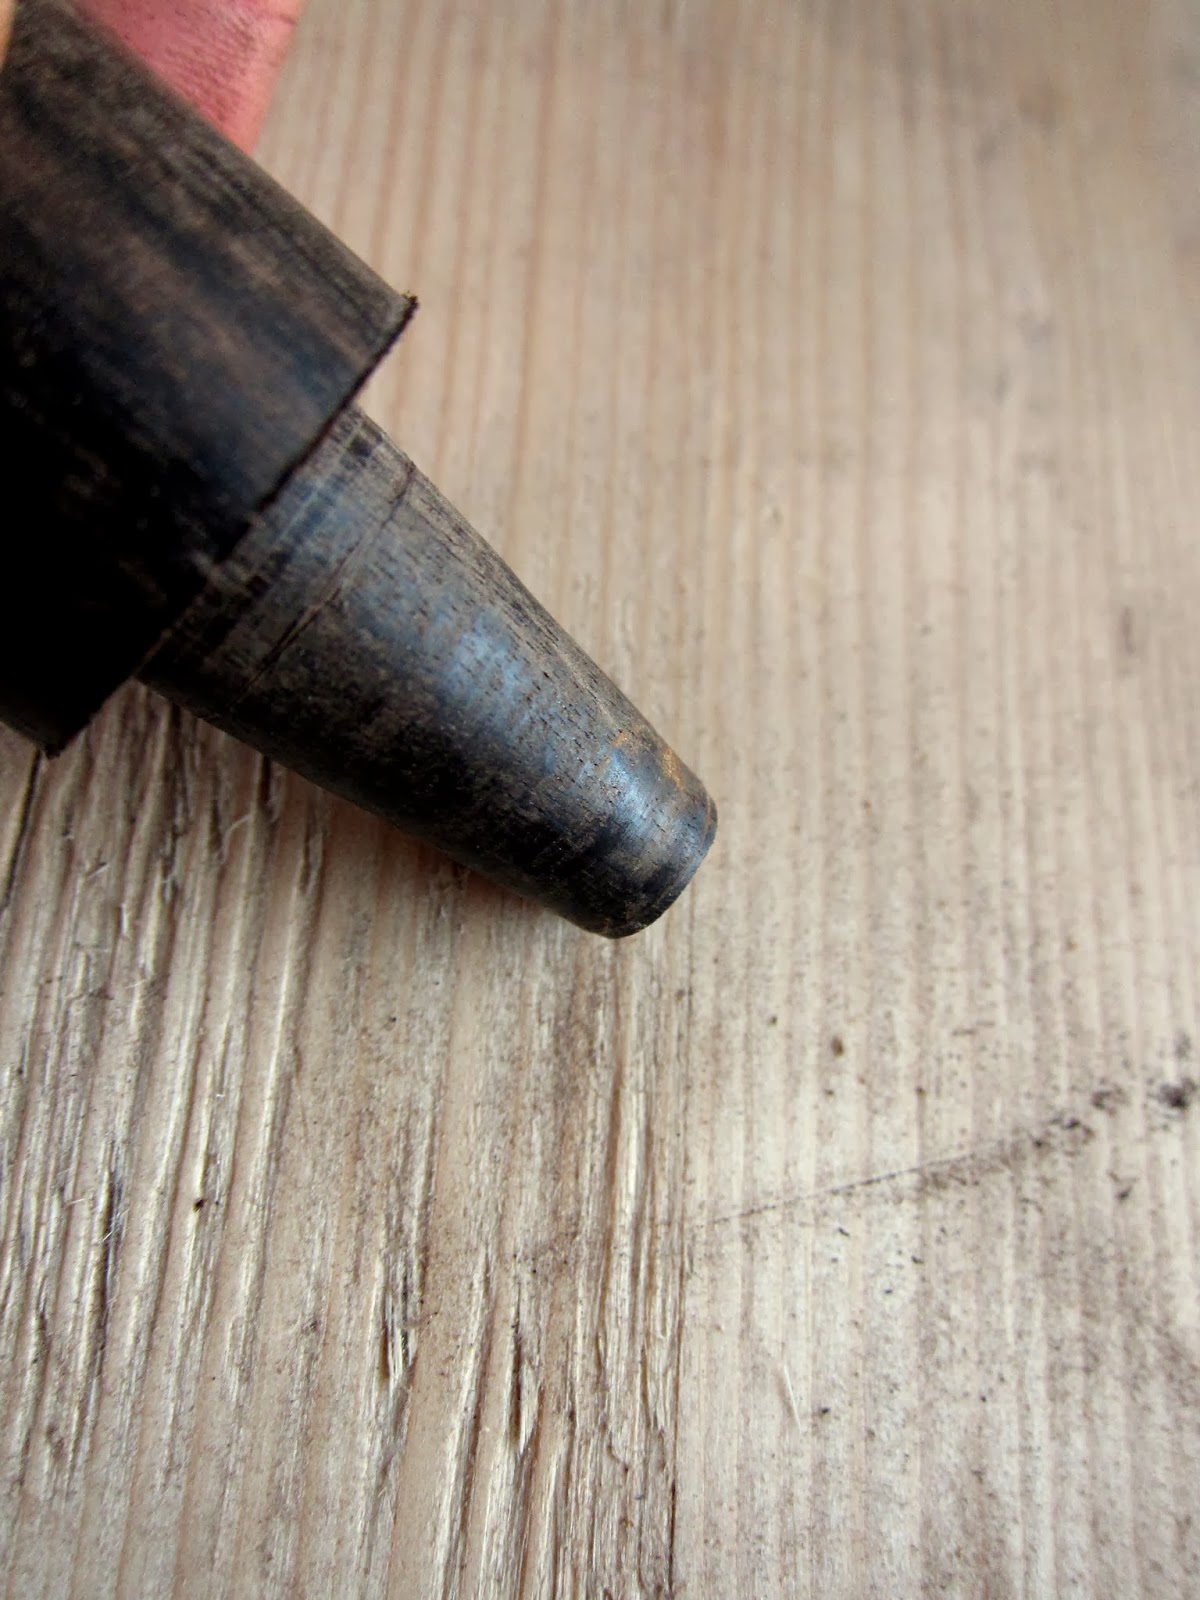
Once the basic shape is there I sand the handle to 600 grit.  To get rid of the marks from the drive center, I part the last 1/8" of the handle to a diameter just larger than the drive center.  Then I skew a chamfer onto what will be the butt of the handle.  I like applying finish to anything that I can while it is spinning in the lathe.  I apply finish, let it sit for 30 seconds or so.  Then wipe off, generating heat with the cloth.  For this handle I used three coats of tru-oil applied one after the other.  This left a nice satiny finish.  The last thing I do is to saw off the nub on the end of the handle and clean up the end with another chisel.  Then I fit the chisel to the handle and rap the butt of the handle with a hammer to seat the handle in the socket.


The grip portion of the handle is four inches long.  The macassar ebony feels amazing.  It is so smooth.  I reach out many times each day just to touch it.  I want to make everything out of macassar ebony.  I don't use hoops on socket chisel handles to prevent the ends from splitting.  I do strike them with steel hammers.  Sometimes they break.  They are very easy to replace.

One of the things that I love about using antique tools is that they remind me that I am on a continuum of woodworkers reaching far into the past. The tools that I have inherited through my family give me that feeling plus ten.  I am glad to have them in my care for this time.  Hopefully their next owner won't wonder, "What kind of bonehead ground out the backs of these chisels?"


Sunday, January 5, 2014

A little bit more about the adze.


The adze is finally out of prototype phase and swinging into production.  I've been delaying writing more about it until everything was finalized, which it finally is.  I got a lot of great feedback about the tool at Woodworking in America, and Pete Galbert and I went back to the drawing board to make a few design tweaks that have really upped the performance of the tool, mostly the result of a subtle change to the curvature of the blade and the degree of external bevel.  The first batch of twelve tools is in production, so I thought this would be a good time to provide a few more specifics about the adze.


The main structure of the tool is a steam bent hickory handle joined to an East Indian Rosewood head.  The tenon on the end of the handle is tapered at the bottom of the joint, flared and double wedged from the top, and assembled with epoxy.  It's like a chair joint on steroids; rugged, and it has to be to take the abuse this tool is subjected to.

A batch of adze blades awaiting heat treatment with a couple of un-forged steel blanks.

The blades are forged from 1/4" O1 tool steel,  flared out at the cutting edge (1 3/4" from point to point after it is bent).  The sweep of the edge is a two inch radius, enough curve to keep the corners from digging into the work and flat enough to be able to leave a surface that is relatively smooth and quick to clean up with the inshave or travisher.  The blades are drilled and countersunk for a hex flathead machine screw that secures them to the rosewood head.

An allen wrench loosens the blade.

Blade removed for grinding or sharpening.

The machine screw threads into a cross dowel which is inset into the side of the head.  When I assemble the blade and the head, I ever so slightly offset the machine screw hole in the head toward the shoulder that the back of the blade rests against.  As the machine screw tightens down into the countersink, the blade is forced tight against this shoulder, similar to the way a drawbored pin draws a tenons shoulders tight.  This eliminates any tendency of the blade to twist in use.  I remove the blade for grinding and coarse sharpening, like removing nicks from the edge.  For minor touch ups, I leave the blade in place.

This adze is lighter than most adzes of European descent, closer in weight to the elbow adzes of the Pacific Northwest.  Weight and balance of the tool was a major design consideration and one of the reasons for the mountain of adze prototypes that I made.  I inserted weights into different portions of the head to experiment with the total weight of the tool and the amount of weight in front of and behind the handle.  The final version has a thicker blade than my prototypes which eliminated the need for added weight.  The thicker blade also gave the tool the forward balance that I knew I wanted as a result of my prototyping.  Forward balance makes the tool track more intuitively in the cut and also puts all the weight right where the tool is working.


The action of the adze changes dramatically depending on where and how the handle is gripped.  As a rule of thumb the closer to the head the handle is gripped, the more aggressively the tool will dig into the wood.  The closer to the end of the handle the tool is gripped, the less the tool bites and the more easily it clears chips.  Each user's sweet spot to hold the handle will be slightly different, corresponding to differences in forearm length, style of swing, height of work surface, and the desired cutting action.  The red rubber band on the handle slides up and down and functions as a reference point for repeated hand placement.  This is especially helpful when learning to use the adze.  Does that rubber band look familiar to anyone?

North Atlantic Lobster bands.  Welcome to Maine.

To use the adze most effectively, a relaxed grip is essential.  This allows the tool to pivot in the hand at the end of the stroke, which helps to clear chips instead of digging, digging, digging in.  There are times that you want to dig in, but that's another blog post.  I start my grip by wrapping the thumb and index finger at the top edge of the band.  I also wrap my middle finger around the tool, while my ring and pinky fingers remain relaxed.


The following pictures show how much this grip allows the tool to pivot in the hand.

Adze pivoted back in the hand.
Pivoted forward.

Please note that the my wrist position is the same in both of these photos.  The main portion of the swing comes from the elbow joint which generates power and provides gross movement of the adze along an arc.  Imagine if the tool was gripped tightly and there was no movement in the wrist.  In this scenario, the adze would only be able to cut along that one arc, with a radius originating at the elbow joint.  Allowing the tool to pivot in the hand slightly allows the user to adjust the arc on which the tool is traveling to cut a wider or tighter curvature, as desired.  Allowing the tool to pivot also seems to increase power.  I'm going to have to do a video about this!

Roughing out a complex shape like a windsor chair seat requires several types of cuts with the adze and different grips for more power or control.  I do plan to venture into video soon to better illustrate this and other techniques with the adze.  More to come.

Monday, November 11, 2013

Repetition.

I was out of town for a couple of weeks recently; down in Cincinnati for Woodworking in America (peddling my wares) and then in Pennsylvania for a short visit with my family.  WIA was a blast.  I met too many good people to mention here, and had the opportunity to let other people put the new adze through its paces.  Between the adzing, turning demonstrations for the Galbert caliper, and travisher demonstrations, our booth was a mess for the entire show.
 
As much fun as I had traveling, it felt great coming home to Maine.  I stopped by my workshop as I drove into town to drop off some tools.  After I set down the boxes I stopped and felt my body completely relax for the first time in two weeks.  Home, sweet home.

Reamers in progress.

It is fair to say that for the month leading up to WIA I was basically living in the workshop.  My goal was to finally catch up with the reamer wait list and build a supply of reamers to take with me to the show.  I was also finalizing the adze design and making finished prototypes to take along, but mostly I was cranking out reamers like the little one man factory that I am.


It might sound crazy, but I love the repetition of making the reamers.  I pull ten air dried hickory rounds from the rack above my bandsaw, rough turn, drill, duplicate, turn the top, sand, finish, saw the blade slot, drill for the adjuster screw, cut the shaving reliefs, drill and install the brass tip, ream for the handle, and fit the blade.  It's not really as fast as that description made it sound, but at the end of the process I have ten reamers. I love watching them take shape.  The process is controlled, but it still takes awareness and skill to move through it without losing a few blanks.  That's what keeps it fun.

I started a new batch last week which will take me over 150 reamers so far this year.  You would think that I would have the process figured out and nailed down in every way by now, but I learn a few new things each time I make a batch.  Early on, the lathe duplicator taught me a lot about vibration.  More recently, I've been learning how to find a rhythm in the order of operations that carries me through the process a little faster.

Complete.

It's funny but my two weeks out of the shop completely throw off my rhythm.  I had to think more about everything that I was doing and I even did a couple of steps out of my normal sequence.  That gives me a couple more things to work on when I make the next batch, and that is what keeps it interesting.

Monday, October 14, 2013

New Adze and a Stack of Reamers for WIA.

Prototype mountain.

For the past six months I have been developing an adze with Pete Galbert.  The intent has been to make a tool that is intuitive to use, easy to control, and doesn't wear out your forearm.  My shop has been overflowing with prototypes and woodchips throughout the process.  Above is but a selection of the prototypes (sans blades).  I am sure that Pete could contribute at least another half dozen to my pile.

I've made bevel-in blades and bevel-out blades, tools balanced with the weight forward of the handle, centered on the handle, and behind the handle, straight handles and extremely curvaceous handles, and I've attached them to the heads at every angle that I could imagine.  I'm pleased to say that we have settled on a geometry and design and I will have two to take with me to Woodworking in America later this week.


More details about the adze soon, just a couple of teasers for now.  I'm thrilled with the looks and performance and I can't wait to get them into other peoples hands.  So if you are going to be at WIA, PLEASE come by and chop up some pine with one of them.  Chips will be flying and we will be making a mess, join in the fun.  I'll be setting up with Pete, Claire Minihan (amazing travishers!), and Caleb James, who I think is bringing some of his planes along.  Stop by to try out some tools and talk chairs and chairmaking.  Oh man!  And to check out the new Drawsharp drawknife sharpener.  I've been using an early prototype for the past few months and I love it.  I've been oogle-ing the pictures that Jameel Abraham posted on the Benchcrafted blog for the past week or so in spare moments.  I can't wait to see the finished tool.

Also for the first time ever I will have reamers available for purchase with no wait.  So stop by and try one out as well.
Reamers.

Tuesday, October 1, 2013

A Slipstrop

My new slipstrop.

I finish sharpening most of my tools with a strop.  The give of a leather strop ever so slightly reaches around all of the imperfections in my sharpening technique, while only rounding the edge a small amount.  Not enough to interfere with future sharpening.  I have used a few techniques to strop the insides of gouges, adzes, and inshaves in the past, but I've never been quite satisfied with any of them, until yesterday.

Slipstrop next to my standard strop for comparison.

I used to keep a specially shaped wooden blocks or various dowels charged with stropping compound bouncing around on my workbench, or some other inconvenient place.  These invariably made their way into my scrap bin eventually.  Then I would make another, which would also find its way into the bin, or linger too long on my bench top or window sill encouraging an exponential growth of clutter.  When I grew tired of that routine I found I could usually work the corner of my regular strop (a little over 1" wide) into the inside of most curves.  This basically worked, but it was a bit awkward, and I never felt like I could apply the amount of pressure that I wanted.  Enter the slipstrop.

Strops and a favorite gouge.

This week while forcing my too wide strop into the inside of an adze, I thought of those fine little slipstones that fit nicely in the hand and can be used to work the insides of these curved tools.  I pulled a piece of 1/4" scrap out of my bin, cut and glued a piece of leather to one edge, and in ten minutes I had the perfect tool for the job.  This narrow strop is versatile and will work in all of my curved tools that my wider strop can't reach into.  Instead of having a special block or dowel to keep track of for various tools, I have just this one strop.  Now I just have to drill a hole in it and hang it up so it doesn't clutter up my bench top and find its way back to the scrap bin.

Hold it like a slip stone and strop away.


Tuesday, September 24, 2013

Shaving Horse - The Business End


The swing arm and work platform are the heart and soul of this shaving horse.  The tight tolerances of these two parts prevent the head from racking and simple improvements to the height adjustment mechanism make for a more powerful and easy to use horse.  My previous post, Build a Better Shaving Horse, is a general overview and offers more insight into the design and features of this horse.  This post deals with building it.

My loud associate.

I used a power planer to thickness most of the parts for this shaving horse.  Ninety-nine percent of the time it slumbers silently in a dark corner in the closet of my workshop.  This is not a necessary tool to build this shaving horse, but it speeds up the process.

Work platform components.

I started by thicknessing the center portion of the work platform lamination.  It is important that this piece slip easily into the base, but not be loose enough to wiggle.  The length of this piece depends in part on the thickness of the rails of your base.  It should protrude 3" or so beyond the base rails and 11" (or more) above the top edge of the base.  I started with an 18" length, which left me with plenty of material to trim away in the end.  This piece is 4 1/4" wide.  I cut a relief at the top to give the swing arm clearance to pivot forward.  The relief cut out measures one inch at the top and tapers to nothing over six inches.

The two wider pieces in the photo form the cheeks and shoulders of this giant laminated tenon.  They are 7 1/2" wide and 11" long.  At this width, southern yellow pine boards usually have some cupping.  I completely flatten these pieces before gluing the work platform together.  These giant tenon cheeks also form the channel that the swing arm rides in, and flattening them keeps the tolerances tight in this critical area.  I also make sure the bottom edge of each cheek is square to the front edge.  This is easy to square up before laminating the pieces together, and more challenging to do later.

All glued up.

When you glue up the work platform there are a couple of things to keep in mind.  The pith side of the each tenon cheek should be oriented toward the center.  Flatsawn yellow pine boards this wide will cup a little over time, even after flattening them.  Orienting the boards this way prevents them from cupping toward the swing arm and pinching it in place.  Tenon shoulders that fit tightly to the base rails help to keep the platform assembly from wiggling and walking around in use. This shaving horse will be subjected to more torque, racking forces, and abuse than almost any piece of furniture.  

I carefully align all the pieces as I clamp the laminations together, with particular attention to keeping the shoulders parallel to each other and square to the center lamination.  No matter how careful you are during glue up, the tenon shoulders will probably need some work to get a good fit with the base rails.  A little time with chisels, a shoulder plane, or a table saw crosscut sled should do the trick.

Hole drilled for a wedge.

Once the glue has dried and the cheeks have been fitted to the base rails, I cut the mortise for the wedge that secures the platform to the base.  I start by scribing a line along the underside of the base rail with the platform in position on the base.  Then, I drill a 5/8" hole, centered on the tenon, and just touching the line.

Wedge mortise squared and tapered.

I square the hole with a chisel, making sure to remove extra material from the top of the mortise wall so that it doesn't prevent the wedge from bearing against the bottom of the base rails.  I like to use wedges with a six degree taper.  They lock tightly with a couple of taps of a drawknife handle.  The bottom wall of the mortise is cut at a corresponding six degree angle.  The dimensions of this mortise are not critical.  Get the angle close and size the wedge to fit the mortise.

Six degree wedge.  Use a hardwood.

See the marks from the mortise endgrain?

If you look closely at the picture above you will see the indentations that the leading edge of the mortise made on my wedge as I drove it in.  That means that my wedge taper is fatter than my mortise taper.  I use a handplane to micro adjust the wedge's taper until I see even indentations from the entire length of the mortise endgrain.

Tenon cheeks and wedge fitted.

The top of the work platform assembly will get more attention later.  For the moment I'll move on to the swing arm.

My screaming companion returns!

My rough swing arm was 32" long by 3 1/4" wide.  With the work platform wedged to the base, plane the swing arm to fit the channel in the lamination.  Proceed slowly.  The swing arm should slide easily without binding in the channel, wiggling should be minimal.

Layout for adjustment pin holes.

The height of the head is adjusted by a pin that fits into a series of holes in a groove on the swing arm.  The groove should be on the same side of the horse as your dominant hand when seated in the working position.  Lay out a line two inches down from the top of the swing arm and wrap it around the workpiece.  This line will become the tenon shoulders that the head will rest against.  With a combination square or marking gauge, lay out a line 7/8" from the front edge and 6" long that begins 3 3/8" below the shoulder line.  From the beginning of this line mark center points every 9/16".  Drill a 1/4" hole at each of these points.

Holes drilled.  Groove grooved.

With the holes drilled, it is time to cut the groove that keeps the pin aligned while you are changing the height of the head.  I used a Stanley No. 50, which is not designed for cutting stopped grooves.  I removed the remaining humps in the ends with a 1/4" chisel.  Use whatever does the trick.  In a pinch you could do it all with just a 1/4" chisel.

Back to the platform.

Work surface mocked up.

It's time to make some decisions about the height of the finished work surface.  My work platform is 10 1/2" from the top of the base rail to the top of the platform at the leading edge, and the platform is sloped at 7 degrees.  I'm pretty short, 5'5", so if you are much taller you may want a taller platform.  Before you cut the angle on the top of your laminated tenon assembly, don't forget to subtract the thickness of the platform piece that you will add later.  My platform piece was 1" thick, so the leading edge of my laminated assembly is 9 1/2" from the top of the rail, which gives me a platform height of 10 1/2" at the leading edge.

Cut the slope on the top of your laminated assembly.

Clearance for the swing arm.

Next, hold the swing arm in place so that there is at least a 3/4" gap between the back of the center lamination and the front edge of the swing arm.  This gap gives the swing arm clearance to pivot forward.  Mark a line that is centered on the groove.  Carry the line down the side of the cheek one inch and make a mark at that point.

Laying out the hole for the adjustment pin.

Drilling the hole for the adjustment pin.

Use a drill press, mirrors, or a couple of squares to drill a 1/4" hole through the tenon cheek at that point.  My drill bit wasn't long enough to drill across the channel and into the other side on my drill press.  I chucked the very end of the bit in my cordless drill and used the first hole as a guide to drill 3/4" into the opposite side.  The better the alignment of the holes as they are drilled, the less fussing to get the pin to fit later.

Holes aligned.


I like a low profile shaving horse head.  This makes it easier to reach over the head to work on the other side of the swing arm (especially useful for spoon carving).  Because I am working with dimensional lumber in this design I needed to laminate a piece for the head to get the 1 3/4" thickness that I wanted.  But before I laminated it I cut the mortise all the way through one piece.  This makes it easier to shape the mortise and get a good fit with the tenon.

Laying out the mortise on the head.

The head is 6 1/4" long and 4 1/8" wide.  The joint that attaches the head and the swing arm is a bit odd.  The mortise is oriented across the grain, with endgrain forming the two long sidewalls of the mortise.  This has some downsides from a joint strength perspective, but it has to be this way to keep the head as low profile as I want it.  I have been using my previous shaving horse for 3 years and the joint is intact.  Curtis Buchanan has been using a shaving horse that I built like this for him for the past year and his is intact.  And any shaving horse in Curtis' shop gets a workout.

Bulk of mortise waste removed.

The mortise is 5/8" wide with a 3/4" haunch on the back edge.  I remove the bulk of the material on the drill press and then square up the sides and ends with chisels.  This is a through mortise until I laminate another piece for greater thickness on the other side.  I take advantage of that and work from both sides to make a very clean, precise mortise.

Ends squared up and sides cleaned.

Tenon cut.

Cut a 5/8" tenon with a 3/4" haunch at the back edge on the top of the swing arm.  Because the grain orientation in this joint is a little funny, I feel it is important for this joint to have an exceptional fit.  Don't rush this part.  When the joint is fit up, cut off any of the tenon that protrudes through the head.  I scribe a line around the tenon and cut to the inside of the line to leave a little space for glue.

Joint fit up with steel pin above that will lock the tenon in place.

Laminating the head.

Even though I only needed to add a 1/2" to get the head to the thickness I wanted, I laminated a full 1 1/2" piece.  The extra thickness acts as a caul and distributes the pressure of the clamps more evenly along the glue surface.

1" yellow pine for the treadle and platform.

While the glue in that lamination is drying  it is a good time to take care of a couple of odds and ends that will finish out the build.  I use 1" thick pine for the platform top and the treadle.


The platform top is 6 1/4" wide and 8 1/2" long with a cut out for the swing arm.  I like the platform top to overhang the laminated portion a little in the front and the back, just for looks.  Two 3" long screws hold the platform in place.  I have a stash of leather that I bought a few years ago in Tennessee at a flea market that I like to glue to the top of the platform to prevent workpiece denting.  This is good stuff.  Pete Galbert has found that vegetable tanned leather is a little too slick.  Jameel Abraham, of Benchcrafted, recommends using suede on vice chops.  Since he is the reigning king of workholding, I would wager that suede is a good choice.

Treadle tenon.

The treadle has a 5/8" mortise that slides onto the bottom of the swing arm and is secured with a wedge.  The distance from the bottom of the head to shoulder for the treadle is 27 3/4" on the front edge of the swing arm.  The treadle shoulders are cut at 10 degrees.  The process for cutting and fitting the wedge is the same as for the wedge that secures the work platform to the base. 

Treadle top.

Treadle bottom.

The treadle is 8" wide at the front edge and 3 3/4" wide at the back.  Total length is 13" and the distance from the back edge of the treadle to the back edge of the mortise is 1 3/4".

Joint complete.

Back to the head!  Once the glue has dried saw or plane the head down to 1 3/4" thick.  Test fit the tenon again and make sure that it is not too long.  Trim if necessary.  If you leave the front corner of the head square a couple of things will happen:  the corner will crush immediately and it will dent the carefully shaped workpieces that you put in the jaws.  I like to cut a rabbet on the front edge and add some kind of padding to eliminate the denting.  In the past I have used thick leather, which works great.  But I wanted to try something different for this shaving horse.

Rubber insert.

I bought some nonmarking neoprene rubber from McMaster-Carr to try.  It was 1/4"  thick and I left it 1/16" proud of the wood.  It is superglued in place.  The rubber holds like crazy!  No spindles slipping out of these jaws and knocking the wind out of you.  But unfortunately it is too soft (50A) and I would prefer something less squishy.  I'll order some harder neoprene rubber in the future and give that a try.

Another option to reduce denting is to radius the leading edge of the head and glue some suede in place.  If you try this, I would love to hear your impressions.

Gluing the head to the swing arm.

Next up, joining the head and the swing arm.  I used the cut off from the bottom of the swing arm as a caul to give my clamps a good bearing surface.

Layout for the steel pin.

Once the glue has set up, I pinned the tenon in place with a piece of 1/4" steel rod.  The rod passes all the way through the tenon and into the front portion of the head.  I like to make the pin as long as I can without it popping through the front of the head.  The pin is centered on the swing arm to assure that it passes through the center of the tenon.  I drilled the hole a 1/2" up from the shoulder of the joint.  Precision is important in this operation, so that you don't drift and drill through the side of the tenon.  Use mirrors or whatever you need to keep your bit as straight as possible.  I used my drill press.

Drilling for the pin.

Make sure the hole passes all the way through the tenon and into the front of the head.  The pin is crucial to the longterm strength of this joint.

Steel pin driven home.

I am fairly confident that a good hardwood pin would be functional in this application.  But then you wouldn't have that shiny little chamfered pin on the back of the head to look at.  Whew!  I love the way that looks.  The pin is glued in place.  Epoxy is the best choice.  I had superglue on hand.

Filing the adjustment pin to fit.

If you have ever tried to fit cold rolled steel rod through a hole that is nominally the size of the rod, you will know that it doesn't always work out.  Sometimes the surface of the rod is uneven and the stated dimension can be over or under sized.  Precise, it is not.  Inexpensive and widely available, it is.  I file the 1/4" rod to get the fit that I want.  The process for changing the diameter of the rod is the same that I use to whittle a windsor chair spindle.  Long light passes with the rod rotated a small amount after each pass.  Test fit with the swing arm in place until you have a nice smooth action that does not bind.

Marked for bending.

I like to bend the end of my adjustment pin around which helps to keep it from sliding out as I work.  Locate the bend by inserting the pin into the work platform as far as it will go.  Make a mark 1/2" out from the surface of the wood.  Make a mark that won't disappear when the rod is heated.  A propane or MAPP torch provides plenty of heat for bending stock this small.

 
Bending the adjustment pin.

Heat the rod and bend it at the desired point.  A metal machinist vise, which I don't have,  is the tool for this job.  I found that I could clamp the rod in the underside of my saw vise.  I don't think I damaged it.  Heat the rod in the open air and only clamp it when the section that you want to bend is glowing.  Pull up the bar fast for a nice, tight curve.  Plenty of extra length makes this easier.

First bend.

I didn't get any pictures making the second bend that wraps the pin back around.  Probably because my bending setup was so lousy and I was fighting it the whole time.  The second bend is easy if you have a good metal vise or more ingenuity than me to make do with what you do have.  The second bend is another 90 degree bend, 1" down from the first bend.  Cut off the rod 3/4" from the second bend.  Here is the pin in place on the horse.

Hole layed out for end of pin.

Looks better than a straight old pin, right?  Drill a 1/4" hole to house the end of the pin.

Adjustment pin in place.

Only the seat remains.  I carved a prototype stool seat.  I can't advocate for a comfortable shaving horse seat strongly enough.  I find sitting on a plank or sitting on a bicycle style seat for hours unbearable.  My butt hurts just thinking about it.  I recommend using whatever tools you have to play around for a little while and carve a seat.  Try a shape or an idea that you saw somewhere or that has been bouncing around in your head.  Curtis Buchanan uses sack back seats and Pete Galbert uses stool seats.  Both are comfortable.  Treat yourself.  Hopefully you will be spending many, many hours on that seat.  If at any point you start to develop calluses on your butt (seriously, I have had butt calluses from terrible shaving horse seats), stop whatever you are doing and carve a comfy seat.  You will never regret it.  This little seat took me half an hour to carve, and I had a blast doing it.

Prototype stool seat.

Fin and risers for forward tilt.

I screwed a fin to the bottom to slide between the base rails.  I also added a couple of riser blocks to tilt the seat forward a little.  I find a level or slight forward tilt to be a comfortable working position.  The seat completes the horse.

Now, on to more pressing tasks!  Like shaving a small mountain of adze handles.